Workflow
Before using NativeBase Starter+ screens to supercharge your development, we strongly recommend that you have a basic understanding of NativeBase first.
You have a couple of options to choose from, to use NativeBase Startup+ screens in your project.
Option 1:#
- Use any of the included starter kits in
starter-kitsfolder that suits your needs. - These starter kits have 5 of the Starter+ screens integrated. So you can get started without any extra setup.
Option 2:#
- Start a new project with any of the frameworks supported by NativeBase by following the instructions here.
- You can also install NativeBase in an existing project by following the instructions here.
After doing one of the above, you can got to storybook/stories-js/modules folder inside screens and copy the required code from any screen you want.
Example#
Here, we will create a new expo project and add a screen from the storybook.
1. Setup an Expo project with NativeBase template#
Refer NativeBase installation for expo here or continue following the instructions below.
If you don't have expo-cli installed on your system, run this command first
- yarn
- npm
yarn global add expo-clinpm install --global expo-cliNow, let's create a new Expo project.
- TypeScript
- JavaScript
expo init my-app --template expo-template-native-base-typescriptexpo init my-app --template expo-template-native-baseRun your app
- yarn
- npm
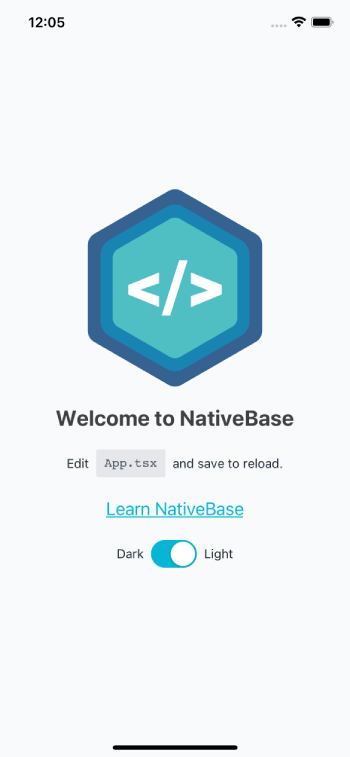
yarn startnpm startIt should look like this:
3. Copying Screen in your project#
Now, suppose we want to copy the SignUp screen from storybook.
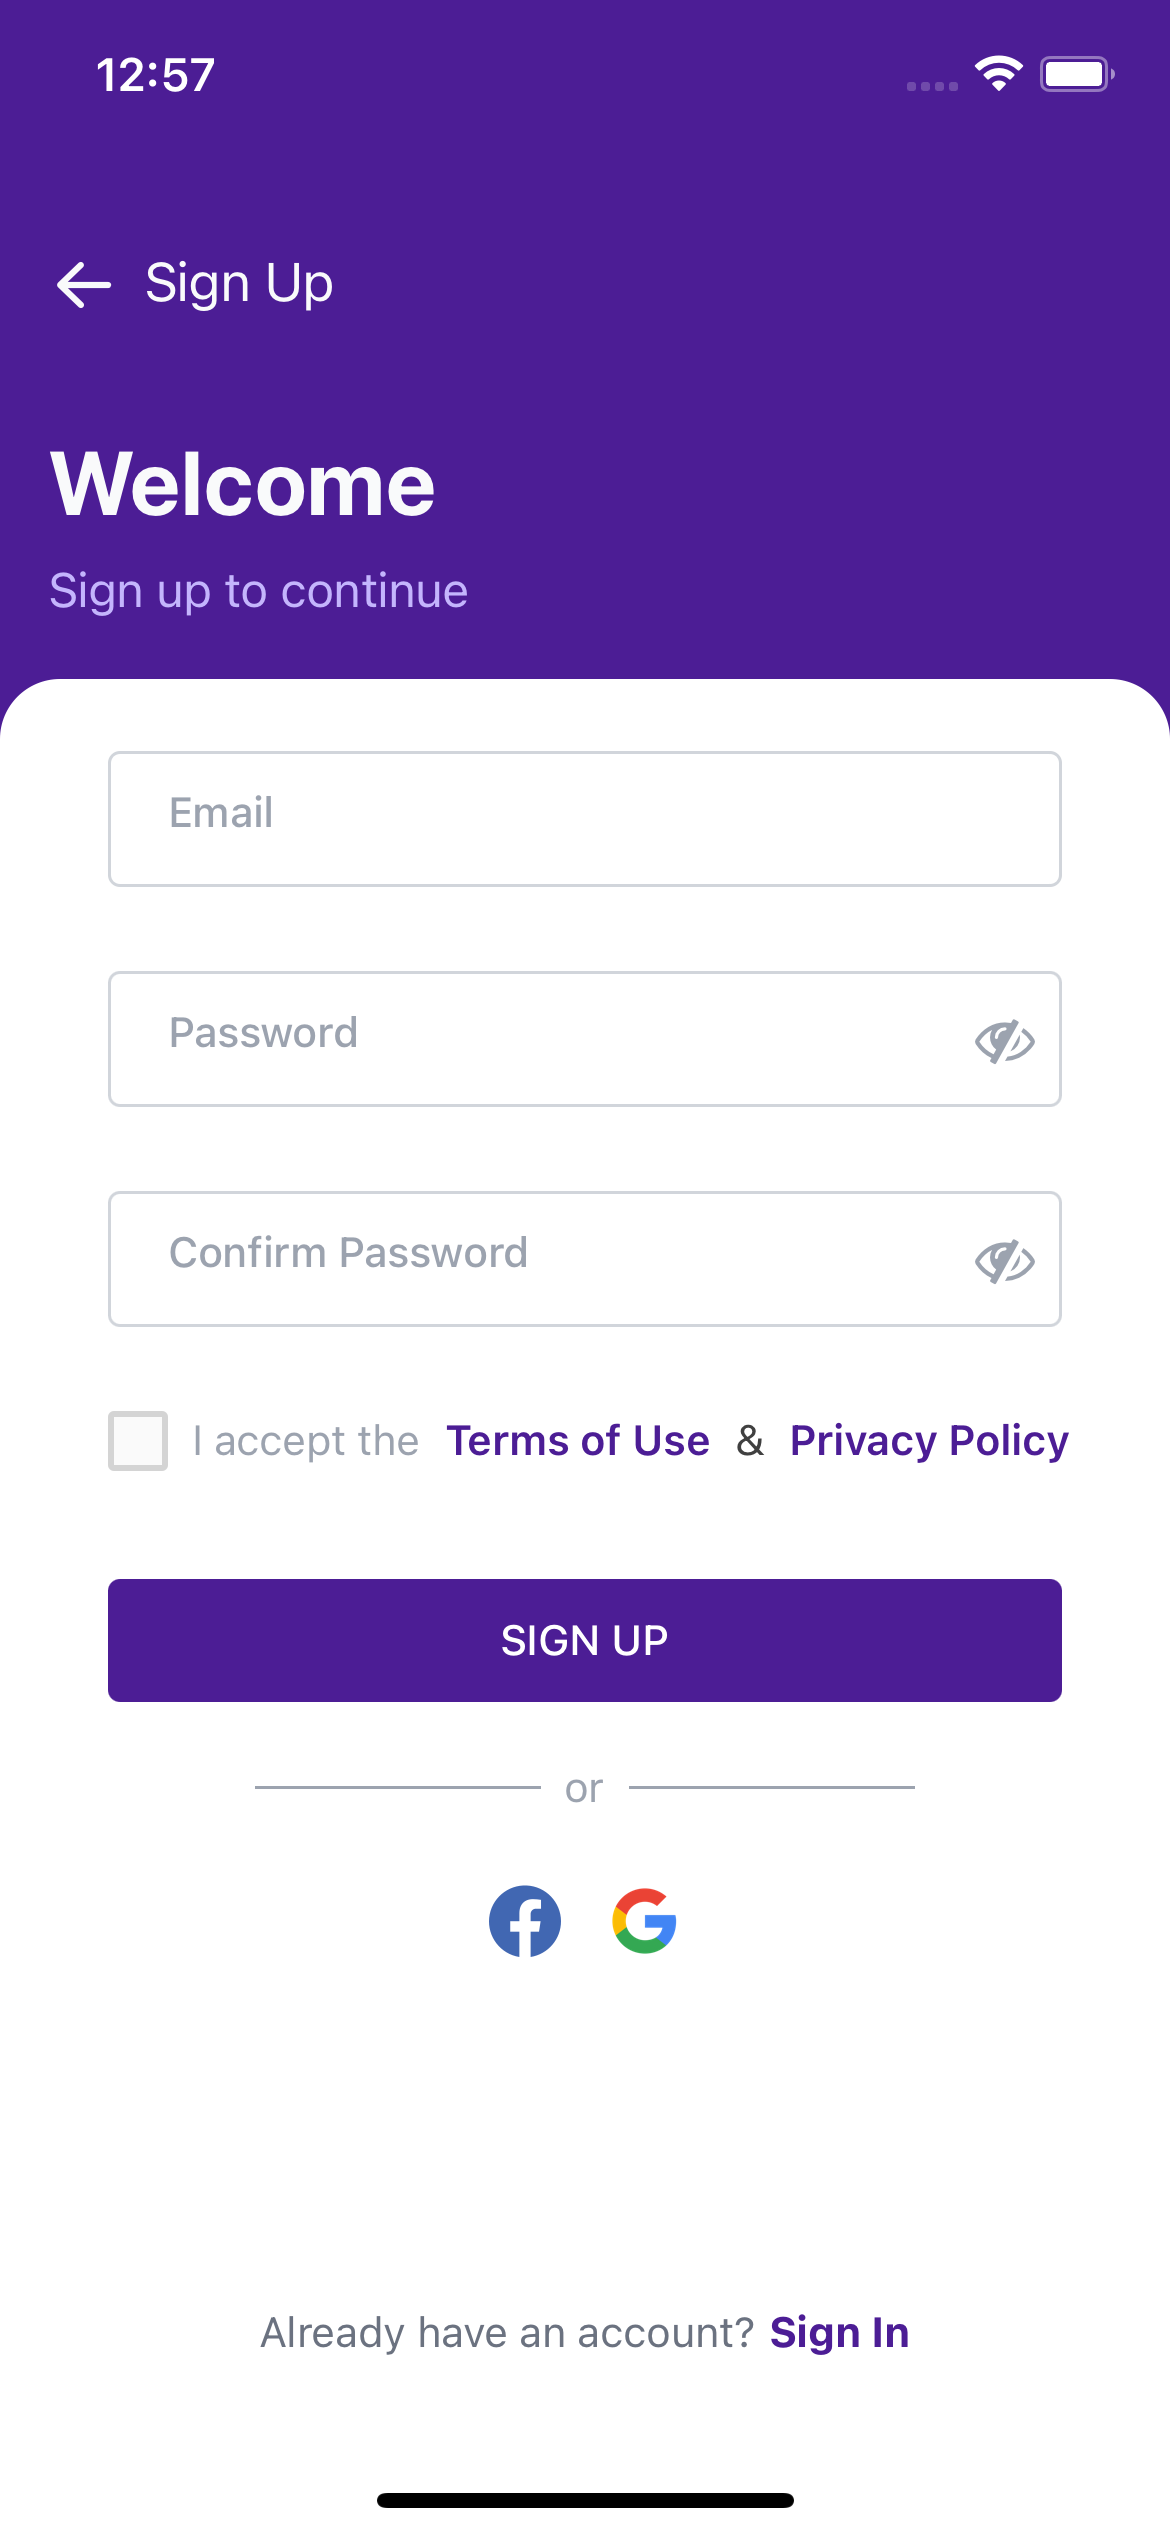
Inside storybook directory, navigate to this file storybook/stories-ts/modules/Login/SignUp.tsx.
If you want to use the whole screen as it is, copy the file and paste it in your project in a folder of your choice(let's say screens/)
Import this screen in App.tsx as shown below or if you are using a navigator, use it at an appropriate place according to that.
import { Box, NativeBaseProvider, Text } from "native-base";import React from "react";import SignUp from "./screens/Signup";
export default function App() { return ( <NativeBaseProvider> <SignUp /> </NativeBaseProvider> );}In your screens/SignUp.tsx, you might see some unresolved imports. That's because this screen might be importing a few components from other files in the bundle.
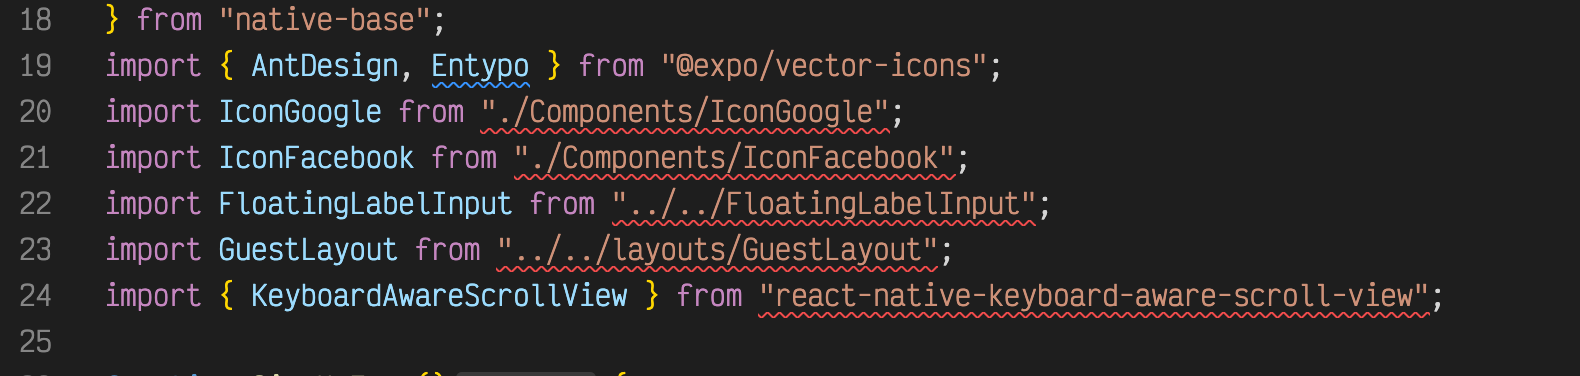
If there are external packages imported, like react-native-keyboard-aware-scroll-view here, you can install using npm or yarn.
If you see some components imported from other files, you can copy those too in your project and update import paths.
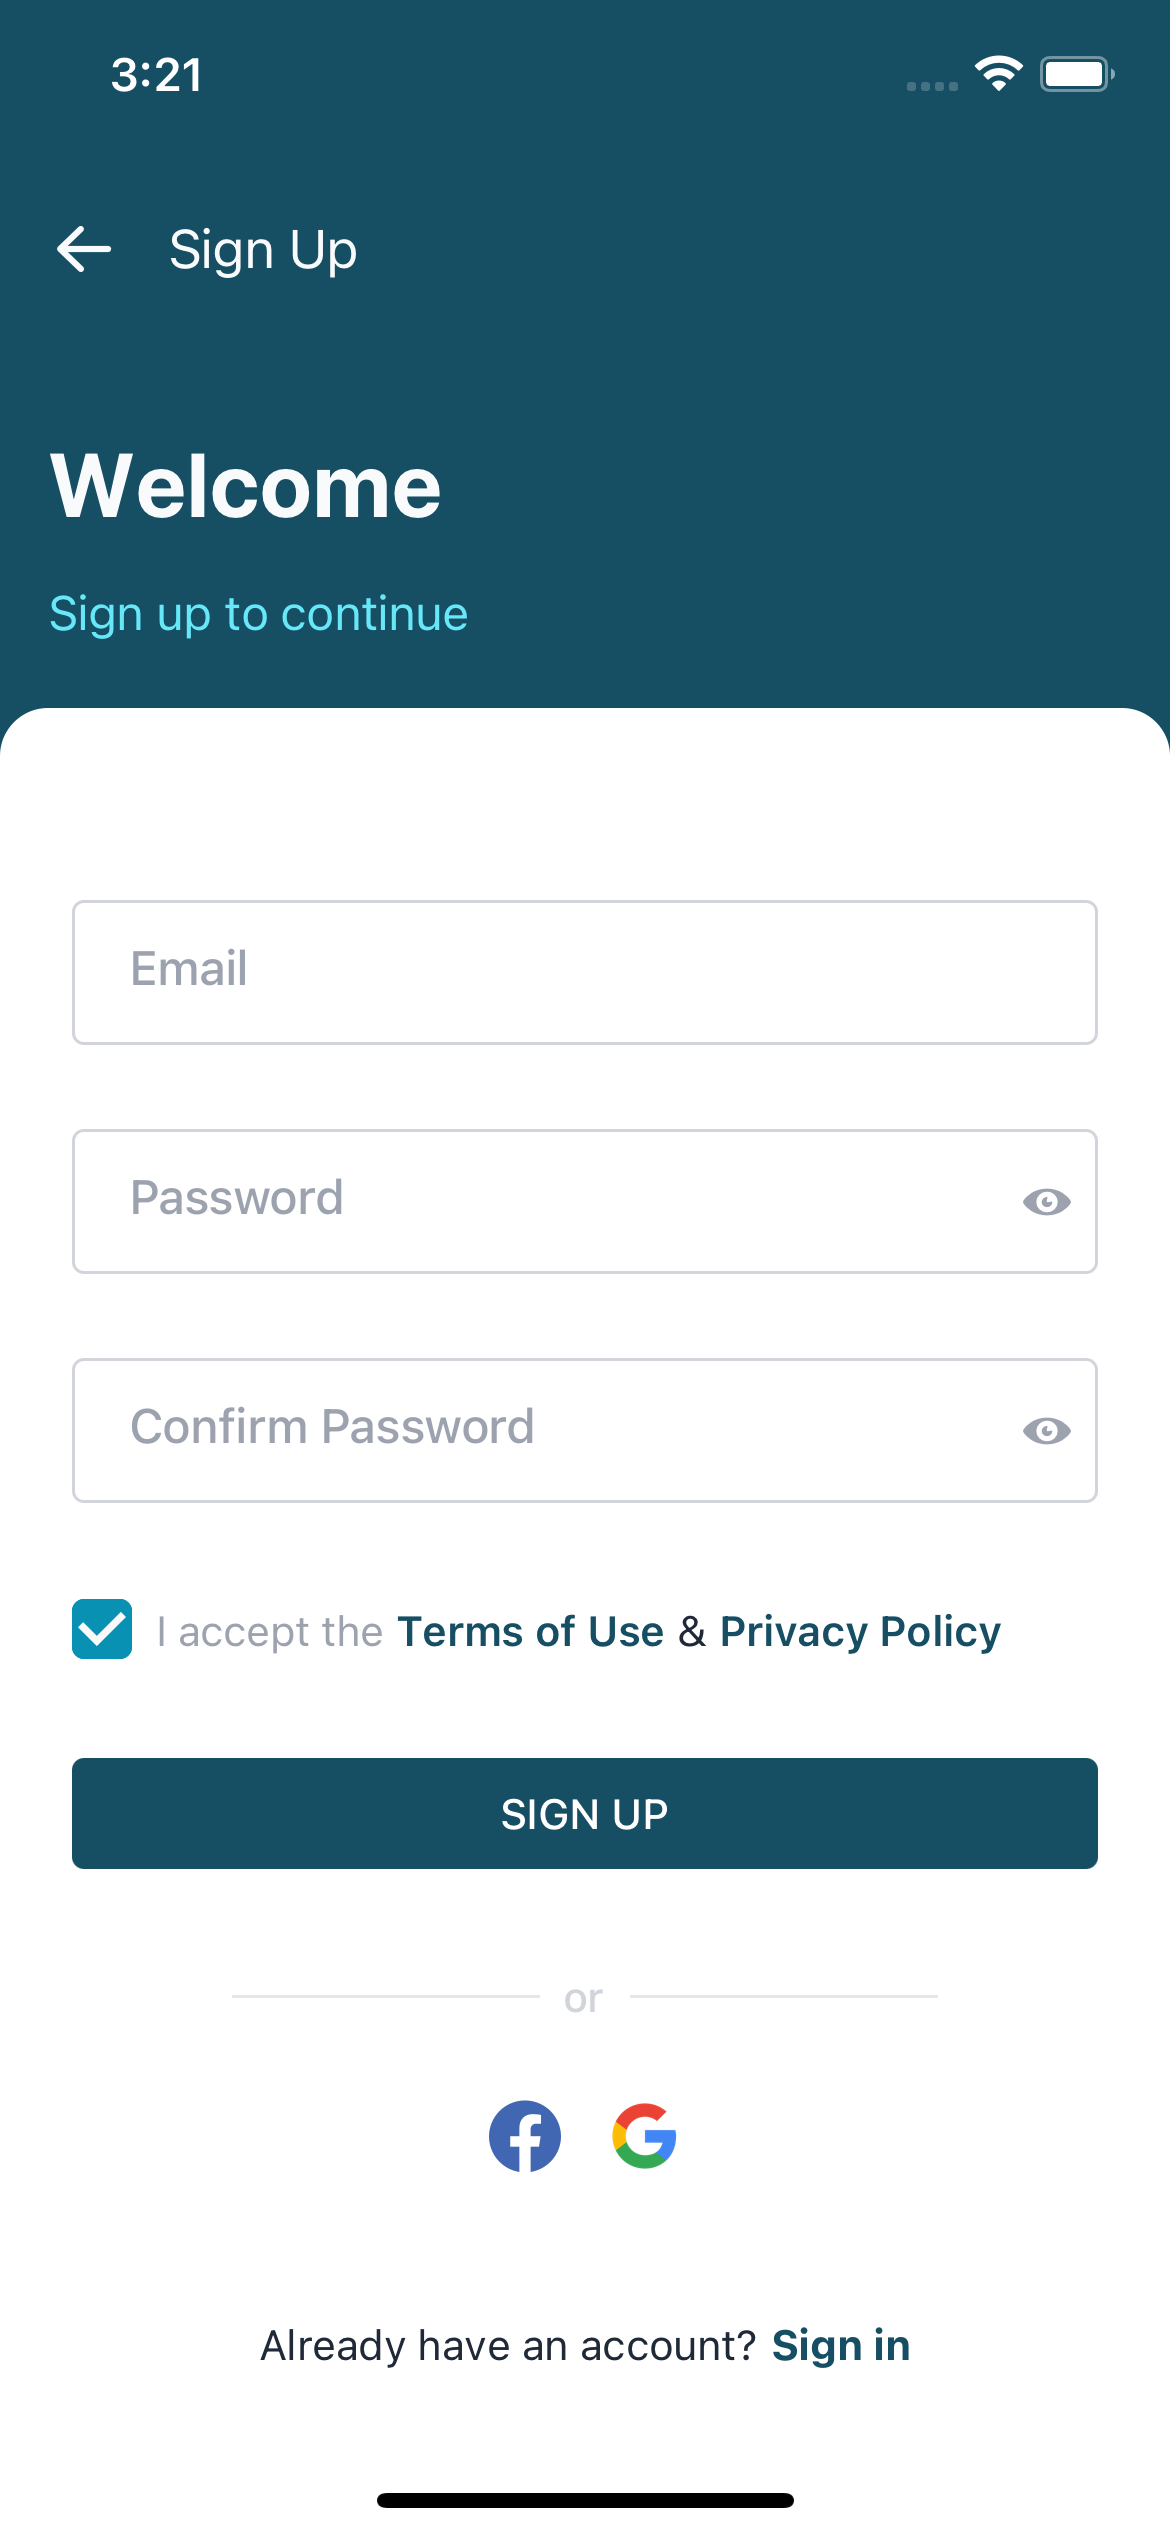
After refreshing, your screen should look like this. If you are wondering why the screen color looks different compared to the one included in the bundle, it's because the default NativeBase theme has been overridden in the bundle while here we're not passing any custom theme to NativeBaseProvider in App.tsx.
This is how you can use complete screens in your own expo project. If you want to use part of the screen, you can copy and paste that specific code in your project.
Note: We can not use NativeBase images directly in a Next.js project so we have to modify the Image import to 'next/Image' and replace source prop of NativeBase Image to src.
// originalimport { Image } from "native-base";// ...<Image  h="24"  size="80"  alt="NativeBase Startup+"  source={require("../components/logo.png")}/>;
// modifiedimport Image from "next/Image";// ...<Image h="24" size="80" alt="NativeBase Startup+" src={require("../components/logo.png")}/>;Incase there are height, width are using value other than integer, we need to fix that also because that is not supported in next/Image, it takes only integer in height and width.